Wednesday, September 30, 2020

BE YOU & BE HAPPY

Hi everyone! I'm here today with another fun card I created for the Cards In Motion class over at the Altenew Academy. 


I've never created a pop up card before so this was a completely new technique for me. She showed us three different types and for my first try I did the standard. 


I used Altenew's BE STRONG stamps and dies to create this. This is a great set for encouragement, especially for the times we're living in right now. 


Using my Altenew artist markers I colored in the images inside and on the front of the card. I added two smaller cacti so it would help cover up the front of the pop out area. 


If you haven't made one of these before I highly recommend it. So much fun and easy to do. 


THANKS FOR STOPPING BY!!


CUTE FALL FOX

 Hi everyone! Welcome back to another challenge over at

As always ANYTHING GOES

We have two great sponsors for this weeks challenge. They are...


Prize: 3 digi images of the winner's choice

AND


Prize: 3 single digi images of the winner's choice

For my card I used a really cute design from Sheep Skin Designs called ELSA.  I had so much fun coloring this cute fox and will be making more fall cards with her. 


I got some cute pumpkin decor today and knew I had to use it for my picture. I will eventually be adding them as decor but, hey, why not right?


I used a cute fall pack of patterned paper from Echo park and a stamp set from Joy Claire's to create the background on the white piece of cardstock. I added a sticker strip to the lower half to help break it up. 


I really like how the blue blends in so well with the fall colors. I never thought to do that before. But this paper pack has patterns that include blue and it looks so cool. 


Now it's your turn. Create something fun and share it over at Penny's. 

THANKS FOR STOPPING BY!!


Monday, September 28, 2020

LOVELY FRIEND SHAKER CARD

 Hi everyone! I'm back today with a fun shaker card for you. I've been catching up on a fun Cards In Motion class over at Altenew and shaker's are the first day.

I created a full front shaker. For the top frame panel I took a 4 1/4" x 5 1/2" panel and cut in at 1/2" on all sides to remove the middle section. Once I had the panel cut I added some tape glue to the back and adhered down a 5 1/2" x 4 1/4" sheet of acetate. 


I used Altenew's Hello Gorgeous Stamp set for my focal image and colored it with the artist markers. I then took buttercream and warm sunshine markers and colored around the flowers to give a bit of a glow. 


I added some antique silver metallic spray as drops and filled it in with the sequins. Once I got the top panel covered with foam tape I was ready to complete my card. 


I finished it off by adding two sentiments from the stamp set and embossing them with pure white embossing power. I used a corner rounder on the outer two corners and "tucked" it into the frame on the top. 


The only thing you can't see is that I ran some golden edge washi tape around all four sides to hid the foam tape. It didn't look at all pretty so I knew I had to cover that up!

THANKS FOR STOPPING BY!!


Sunday, September 20, 2020

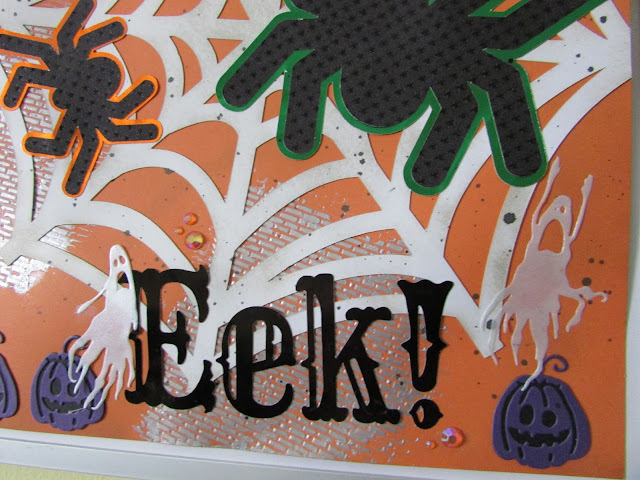
BOO! EEK! WALL DECOR

Hi everyone! I'm back to share another fun project for


Today's project is all about Halloween! Fall is just around the corner and I can't wait. I love all things fall/Halloween (unless it's scary)! I had so much fun creating this wall decor. 


Directions:

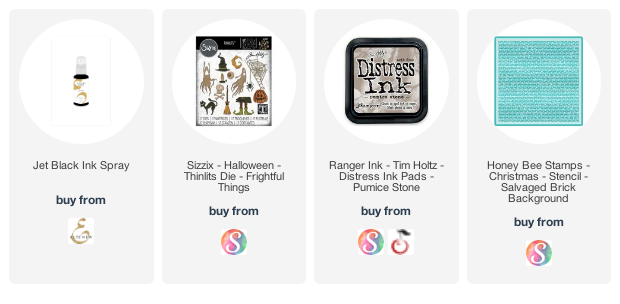
1) Using embossing paste spread it through your chosen stencil and create your background. I used a brick stencil and silver embossing paste. 

2) Cut our your design either with dies or a cut machine. I used my cricut to cut out the large web, spiders, and words. I then used dies from Tim Hotlz for the pumpkins and ghosts.


3) Once all your die cuts are cut start by adhering your layering pieces (spiders and pumpkins) 

4) Take a blending brush and pumice stone distress ink and "distress" your spider web.Start off the image and using circular motions add the ink slowly. This will help you from getting harsh lines. 


5) Now your ready to start adhering your different elements to your base page. Place the spiderweb slightly to the right. Then start adhering your spiders, pumpkins, ghosts, and sentiments. I used a T-ruler to help line my words so they were straight.


6) All that's left to do is add any embellishments you'd like. I added some nuvo crystal gems for a bit of sparkle. 


Thanks for hanging out with me today! I hope you'll give this a try and get crafty!

SUPPLIES: 

Rinea~haunted variety foiled paper packviolet/violet starstruck foiled paper

silver embossing paste, 

SUNKISSED

 Hi everyone! Welcome to another challenge over at

Today's challenge is to use up your OLD STASH items. Get them out and use them up (then you can get new stuff lol). I recently did a huge de-stash so I don't have anything to old.  I did use a paper kit from Simple Stories I've had a little while.


I had some pieces left over so I made a card as well. I hate keeping scraps so better to use them all up!!


Now it's your turn. Get de-stashing and don't forget to share over at the blog.

THANKS FOR STOPPING BY!!

Wednesday, September 16, 2020

A LITTLE POTTER MAGIC

 Hi everyone! Welcome back to another challenge over at

Today's challenge:

INSPIRED BY HARRY POTTER

This was a lot of fun. When I saw this as our next design challenge I couldn't wait to start scouring the internet for all things potter. I found some really fun stuff!

Once I saw these two cute stamp set from PAPER NEST DOLLS I new I needed both (lol that's what I tell myself when I buy things). 

This is what I came up with. I colored both images with my Altenew Artist Markers and love how they turned out. 

I do have to say that I like the Harry card a bit more. In person the hat on Hermione's card looked okay but seeing them in these pictures makes me rethink it a bit. It feels like it's just floating there.


I decided to keep the same layout for both cards to make it easier to cut the images. I used a rectangle die for both the main image and the patterned panel behind both. 


Now it's your turn to play. Get crafty and share with us over on the My Time To Craft Blog!

THANKS FOR STOPPING BY!!

Friday, September 11, 2020

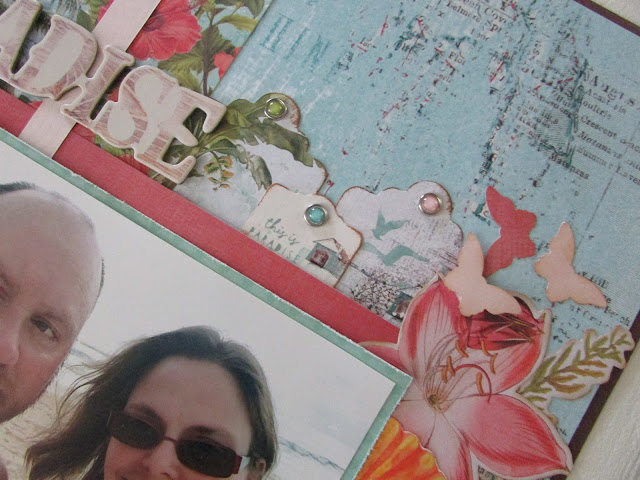
Recipe Challenge Layout

 Hi everyone! I'm a bit late this month for the current challenge over at

The Recipe: please include as many items as you can from the list.
Tags
A stamp
3 or more patterned papers
A punch
Washi tape
Puffy stickers

For my layout I used everything on the list except for puffy stickers. I just didn't have any that went along with the theme of my layout. 


THANKS FOR STOPPING BY!!


Monday, September 7, 2020

REMEMBER...CAPTURE TODAY

 Hi everyone! Welcome back! I have a project to share with you today for 


I used the brand new VINEYARD FOILED PAPER pack for this layout. I'm loving these colors. There's so many different things you can do with them. I can picture making wine glasses with these colors inside as the wine. 

For my project today is a 12x12 scrapbook layout.


HOW TO:

1) Choose your cardstock, foiled paper, stamps, dies, inks, punches and embellishments
 
2) I used Tim Holtz pumice stone distress ink on the edges of the white cardstock and a bit in the center. 

3) Using the Rinea Ghost Ink stamp your image/images onto the Merlot/Melot starstruck foiled paper. Making sure to stamp straight down and with slight pressure so the stamp doesn't move. If you go to quickly the image with move about your foiled paper and your image will be blurred. 

4) Let the ink sit for a minute or so. You'll start to see the color lifting and the underlying silver will show through. Using a towel/paper towel lightly rub the images to remove the remaining color. This gives a really nice effect with minimal effort. 


5) Using either dies or paper punches cut out your designs. I used a tulip punch from Stampin' Up! and word dies from Altnew for my layout.


6) Once you have all your cut out items you are ready to start assembling your layout. I cut the merlot/merot foiled paper down to 11 1/2" x 4" and then tore the inner long side. Mat your photo if you'd like. I used white and then grey cardstock to help give a little "pop" to my photo.


7) Before adhering down the merlot/merlot piece I used a strip of violet/violet to add a bit of color under my photo as well as on some of the tulips. I also flipped the ruby/gold over and cut some tulips so I could add a bit of gold to the tulips.


8) I added piece of the gold/gold starstruck foiled paper behind my matted photo. Once I added a piece of the torn merlot/merlot behind the photo I was ready to adhere it down. I used an adhesive backed foam on the back of my photo to give some dimension (and it made it easier to add embellishments under it)


9) Now your ready to add your title/subtitle and punched embellishments. I also created a tap for under my picture with a sentiment and image. Adding in the foiled paper hearts really helped tie everything in and finished the layout. 


THANKS FOR STOPPING BY!!!
QUICK & EASY CHRISTMAS CARDS

  Hi everyone! I wanted to share a quick post on how I made my Christmas cards this year. I have been so busy lately with school, work, and ...