Showing posts with label Christmas. Show all posts

Saturday, July 20, 2024

MERRY CHRISTMAS

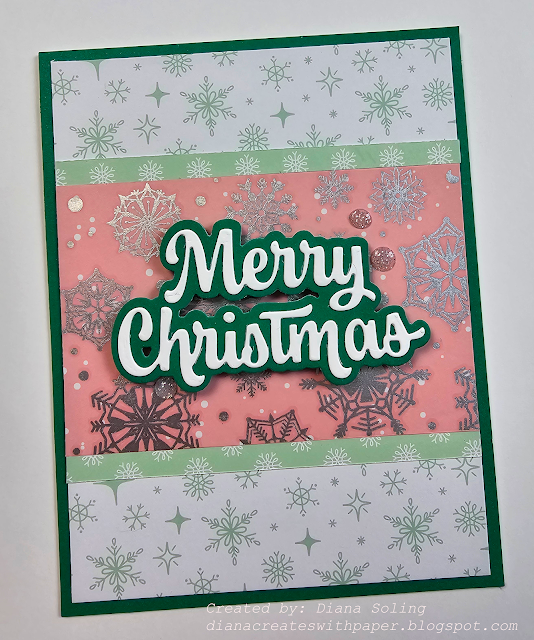
Hi everyone! Thanks for joining me today for my Christmas in July card. Scrapbook.com has been having month-long deals and new products for Christmas and I just had to have the bundle I used on my card today. 

I did join in on a sketch challenge over at Sketch Saturday.


This is the first time I've used one of their sketches and I really like how quickly my card came together. I did add the twist of making it a Christmas card. Now I'm one down for the holiday!

One of the many new products Scrapbook.com is bringing out are rub-ons. I haven't used them for so long and I'm glad they are coming back in. I added silver snowflakes to the pick polka dot paper to give a more wintery vibe and add some shine. 


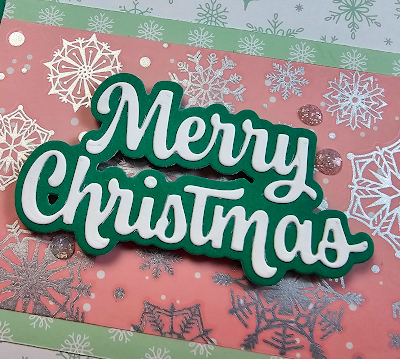
Here's a different angle to show all the great shine and prettiness. I added a some dimensional tape to the back of my sentiment for some added depth. This is a card I could really see making a bunch of for the holidays. 


Thanks for joining me today for this fun sketch challenge. Now it's your turn! 


SUPPLIES:

All products are from Scrapbook.com unless otherwise noted.

Dies: Merry Christmas II

Paper Packs: Holiday Patterned Collection, Cools Smooth Cardstock

Pops of Color: Silver Glitter

Adhesive: Permanent Tape Runner, Adhesive Foam Strips

    

Saturday, October 23, 2021

URBANIZE AN OLD CHRISTMAS CARD

 Hi everyone! Today I'm sharing a fun card I made for the challenge over on Cathrine Pooler's Stampnation site! Each week until the end of November there will be a new challenge to create Christmas cards. 

This week's is to urbanize and old Christmas card you've created. 


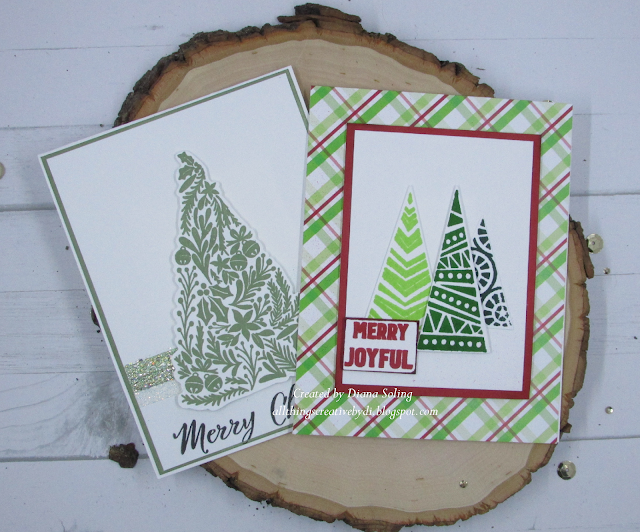
Here is the card I decided to re-make. I remember making this last year. I forgot how much I loved this tree! The glitter strips are what make me happy. Such a subtle accent. 


And here is the card I created today. I used bright colors and background paper. I also used direct to paper inking to create the red piece behind the trees. 


And here they both are side by side. Such a big change. 


THANKS FOR STOPPING BY!!!


Sunday, June 27, 2021

LAWN FAWN CHALLENGE #103 LITTLE THINGS


 Hi everyone! Today I'm sharing a fun card for the latest Lawn Fawn challenge.

(click photo to go to challenge)

I decided to make a Christmas card lol. I was looking through my tiny images and the tiny Christmas and tiny gingerbread called out. I haven't used these two sets yet, so why not!


I cut out the foursquare backdrop out of white cardstock. I used crackling campfire and firebrick to create the main piece. For each little square I used salvaged patina, speckled egg, kitched flamingo, and rustic wilderness distress oxide inks. 


 After adhering the little square backgrounds in I sprayed the whole panel with water and blotted it off with a paper towel. Once it dried I was able to add my colored images. 


For the "floors" I cut out another foursquare panel. Using just the inside pieces I cut the bottom using the hill from sandy beach accent dies. I colored them each in and adhered them to the panel. 


I finished the card with some Christmas colored twine. I really enjoyed playing along!

THANKS FOR STOPING BY!!

Sunday, December 20, 2020

PEACE & JOY WITH RINEA FOIL

 Hi everyone! Welcome back to another design team project for


Today I created a soft and serene winter scene for you.


I started this card by blending two distress oxide blues on the background to give a pretty snowy look. 

Once I finished the blues I used the new distress oxide color rustic wilderness on the bottom half to blend in with my trees.


I, then, used Tim Holtz arctic cover plate to get the snowflakes from the Turquoise/Turquoise starstruck foiled paper


Next, I used Tim Holtz tree line die and cut it four times. Twice from white cardstock and once from two different green colored cardstock.


To create the white caps I cut the tip off of each white tree and adhered them onto the green tree lines.


I wanted to add a bit more foiled paper so I cut my sentiment from Silver/Silver starstruck foiled paper. I also cut it out three times from white cardstock and layered them on top of each other to give some dimension. 


Closer look at the process of layering. I love doing this as it gives more stability and I don't have to cut up any foam!

Once I have all of these pieces done I start putting my card together adding the two layers of trees with the lighter set in the background. 


To finish off the bottom I cut a strip of white cardstock to look like snow drifts in the forest and add a touch of tumbled glass distress oxide to it. I then add the snowflakes around the trees and off the edges. 


The final step is adding the sentiment. I didn't want to cover up the trees so I added it in the upper left hand corner. In this picture you can really see the dimension the layers add. 


 A closer look at the sky and snowflakes. 


Supplies:

Rinea: Silver/Silver Starstruck foiled paperTurquoise/Turquoise Starstruck foiled paper

Tim Holtz: tumbled glass, rustic wilderness, and broken china distress oxide ink, tree line & arctic thinlit dies, 

Catherine Pooler: peace & joy die

THANKS FOR STOPPING BY!!


Sunday, December 13, 2020

FUN GNOME HOLIDAY CARDS

Hi everyone! I have some fun Christmas Gnome cards to share today. 


To create the bright colored backgrounds I took my Catherine Pooler ink pads and ran them across all four sides, just far enough to not leave any of the white panel showing


I had so much fun using this cute Gnome stamp set from Close To My Heart. I was at a crop over the weekend and one of our challenges was to create something in red and green. 


THANKS FOR STOPPING BY TODAY!
     

Friday, December 11, 2020

MONOCHROMATIC MERRY CHRISTMAS

 Hi everyone! Welcome to another fun challenge over at


Today's challenge is: Monochromatic Christmas

For my card today I decided to use Catherine Pooler's Sage ink and embossing powder. 


This card is created using only white cardstock. For the colored panel I used the sage ink pad and ran it over the edges before adhering down my top panel. 


Using two strips of double sided adhesive in two different sizes I created the embossed glitter strips under my tree. 


Per my usual style I didn't think about the sentiment until AFTER my card was all adhered together lol. I seem to do this every single time. I put the panel into my misti and then layed out my sentiment. Using lawn fawn jet black ink I was able to get a nice crisp sentiment.


Here's a closer look of the embossed glitter strips. I haven't used her chunky glitter before and I really like it. 


Supplies:

Catherine Pooler:

Festive trimmings stamp set, festive trimmings dies, wanderlust & bundled up embossing trio, sage ink pad

Lawn Fawn

jet black ink pad


THANKS FOR STOPPING BY!!


Monday, December 7, 2020

A FUN CHRISTMAS TREE W/RINEA & CONCORD & 9TH

 Hi everyone! I'm back sharing another fun design team project for


I started by cutting all of the greens from cardstock using a fun die set from Concord & 9th. Once I had them cut I started adding them to the stick provided.


Once I had them all together I started cutting out my garland, ornaments, and star using Ruby/Gold foiled papersilver/silver starstruck foiled paper

I then started decorating my tree by wrapping the garland. 


What I like best about this foiled paper is if you want you could twist the garland to show both the ruby and gold. I wanted to keep it more traditional. 


I then started adding the ornaments. Since I cut one panel from each color I still have quite a few left over for a future project. 


Here is a closer look at the ornaments once they are added. 


I love the shine this adds! For the star I cut two from the Silver/Gold glossy foiled paper and glued them together at the top of the stick.


Supplies:

Rinea:Ruby/Gold Glossy Foiled PaperSilver/Gold Glossy foiled paperSilver/Silver Starstruck foiled paper

Concord & 9th: In the Classroom-take a bough encore dies

THANKS FOR STOPPING BY!!


Saturday, November 28, 2020

JINGLE ALL THE WAY TAG

 Hi everyone! I'm here to share a fun tag I made. I used a few different techniques on this one. I wasn't to sure about it at first but I really like it now that it's all finished.

I started out by using a peppermint stencil on the background, following it up with a Merry Christmas and dotted stencils in different distress oxide inks. 

I used the new presents die from Tim Holtz and cut out so many presents lol. I have quite a few left over. I see some birthday cards in my near future. 


I finished it off by layering the presents on the tag and then adding some washi tape in sparkle and word type. For the main image I used two different distress embossing powders mixing them slightly to get a nice blend. 

Supplies: Tim Holtz unless otherwise stated

DIES: arctic & tree line thinlit dies, gift wrap bigz die

INK: crackling campfire, rustic wilderness, and blueprint sketch distress oxide inks, embossing pad

Stamp set: bold tiding 3

Stencils: buuble, peppermint, and merry christmas

Accs: christmas label tape, designer tape tidings, crackling campfire & rustic wilderness embossing glaze

THANKS FOR STOPPING BY!!

Monday, November 23, 2020

SLEIGH BELLS RING

Hi everyone! I'm here today sharing a fun slimline Christmas card. I had to much fun creating this card. I don't usually use multiple stamp sets on my cards but I think after this card I'm going to start! I love how it all came together!


I recently purchased a few Christmas sets from Pinkfresh Studio and Catherine Pooler Designs and these set's work great together!


I created the sky using stormy sky and blueprint sketch and blended them together to give it a look as if it's snowing.

For the snow I used the stitched slimline snowdrift dies from MFT. I used all three dies to create the rolling hills for the trees. 

I stamped all my images and colored in those that needed coloring with my Altenew artist markers and got busy creating my scene. 

The cute bear was an add on after I had the card all done lol. He was left over from a card you can see HERE. Once the card was finished it just felt like something needed to be on that end. 


 The last steps were adding in the snowflakes and sequins. I'm the type of stamper who, no matter how hard I plan, always adds things after the card is put together. Like the snowflakes lol. I wasn't going to but once they were on there it was perfect. 

SUPPLIES:

Pinkfresh Studio: sleigh bells ring stamps, sleigh bells ring dies, tree trimming friends stamps, tree trimming friends dies

Catherine Pooler Designs: jolly trees stamps, jolly trees dies, rouge, deck the halls, eucalyptus, spruce, and green tea inks, glacier bay sequins

My Favorite Things: stitched slimline snowdrift dies

Altenew: artist markers, permanent black crisp ink, mini blossom die cut machine


THANKS ~ FRESHLY MADE SKETCHES #673

  Hi everyone! Today, I'm sharing a fun card I made using Freshly Made Sketches, sketch #673.  I have been working hard the last few mon...