Friday, January 15, 2021

THANKS BUTTERFLY TOADSTOOL

 Hi everyone! Welcome to the first challenge of the new year for


Today's challenge is: NEW

Our sponsors for today's challenge are:

Prize: 2 digi images

$10 in images (no patterned paper)

For my card I got to use Butterfly with toadstool by Scribbles Designs. This is such a sweet image and I think really brings in the NEW part of the theme this week. 


I colored my image in using my copic markers. I then cut out the framed thanks and added it over the top of my image. 


I wanted to add a bit of pizzaz to the background so I used a wide washi tape for the the gold strands. On either end I added a strip of darker blue cardstock to help ground the washi tape. I then added some Robin's Nest dew drops and the finishing touch. 


THANKS FOR STOPPING BY!


Friday, January 8, 2021

THANKS FOR THE LIFT

 Hi everyone! Welcome to the first challenge of 2021 at


The theme for today's challenge is THANK YOU!


I searched through all of my stamps and sentiments to see what would be a good image for this first card of the year. When I came across the Up Up and Away stamps and dies from Honey Bee I knew it was perfect. 


What a great sentiment to start 2021 off with! I used tumbled glass and broken china distress oxide inks to create the blue ski. I wasn't sure I was going to add clouds but once it was finished it needed something to break up the blue. 


to add a bit of sparkle I used frosted lace stickles on the clouds and a bit on the heart banner. For the sentiment I used Blown Away stamp set by Honey Bee Stamps and embossed with super fine detail embossing powder on black cardstock. 


Supplies:
Honey Bee Stamps:
Up Up and Away stamp set
Up Up and Away die set
Blown away stamp set

Ranger:
Super Fine Detail embossing power
Frosted Lace stickles
tumbled glass distress oxide ink
broken china distress oxide ink


Thursday, January 7, 2021


Hi everyone! Diana here today with a fun mixed media layout using Rinea foil, paint, embossing paste and some good old fashioned paper punches. 

I found this old pic of my oldest son with his Grandma and Great Grandma on his 5th birthday and knew I needed to create a layout with this treasure. We've lost both in the past 10 years so this is such a special gift. 

I started my layout by cutting this great title cutout from the sillouette design store. I then glued it down to my foil and started cutting it out. I then prepare my background cardstock by adding white gesso.

I left this to dry. Once it was I picked out a fun confetti stencil, embossing paste, and a fun yellow ink refill to create texture on my background.


I then smeared it on my background through the stencil. I moved it around three times. After it dried I realized there just wasn't as much color as I was hoping for.


I pulled out some yellow/gold paint and added some water. This paint has such a great shimmer to it. I started adding it over some of the embossed background. I then did some splatter with what I had remaining on the pallet.

I pulled out some of my "birthday" themed punches and some different patterned papers and started punching different shapes. I then adhered my title and picture down. 
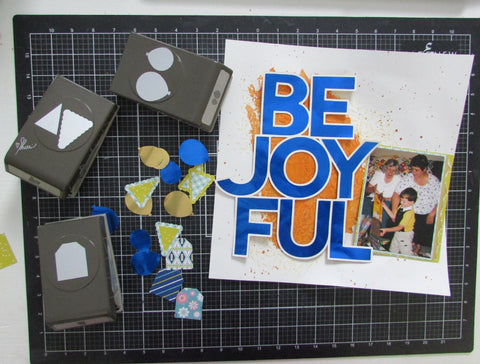
Here are some close ups of my finished layout with all the elements added on. 

I love the how shiny the foiled paper is. Really adds a little more pizazz to my layout. 

I used two different patterned papers under my photo as well as some gold foiled paper with a torn edge to give some texture. 

This is the first time I've used a cut file like this on a layout and i must say I am hooked! I can't wait to cut some more and see what comes of them!!

Supplies:

Cobalt/Gold Glossy Foiled Paper

balloon, tag, and pennant paper punches, paint, water, embossing paste, confetti background stencil, patterned paper. 
Wednesday, January 6, 2021

HOGS & KISSES SENDING LOVE & HUGS

 Hi everyone! Welcome back for the first challenge of 2021 over at

We have two great sponsors for this challenge:


Prize: 4 digi images of the winner's choice


Prize: 3 digi images of the winner's choice

For my card I got to use bobble head greetings "hugs" and kisses from Bugaboo stamps. It took me a few tries to get this cutie colored the way I wanted. I started out trying it in pink and just didn't like it. That's when I decided on grey's.


I had so much fun creating this scene! I wanted the sky slightly pink to give it an evening glow look. I pulled out some fun dies from Honey Bee Stamps to create the burlap background, fence, and grass. 


Once I had all these dies cut and laid out the card just seemed to create itself. Lately I've been watching a lot of youtube videos and scene building seems to be the new fun thing to do. 


I have to say, after making this card, I'm hooked!!

THANKS FOR STOPPING BY!!


Tuesday, January 5, 2021

SENDING ALL THE LOVE

 Hi everyone! Back with another fun challenge over at


Today's challenge is: LOVE 

I had so much fun creating this card! I made two fun backgrounds by mixing some distress inks. This one really seems to glow in the center and I thought it was perfect for a heart card. 


Originally I was going to cut two detailed hearts from the gradiant washi tape I pulled out but it just didn't work. So instead I cut around the outer edge of the heart and then added a paper cut detailed heart inside.  To add a bit more of the gradiant color I created a sentiment strip across the bottom. 


As I use my distress inks more and more I am getting more comfortable with using them and love how my projects turn out. 


FUN PENGUIN PLAY ARTWORK


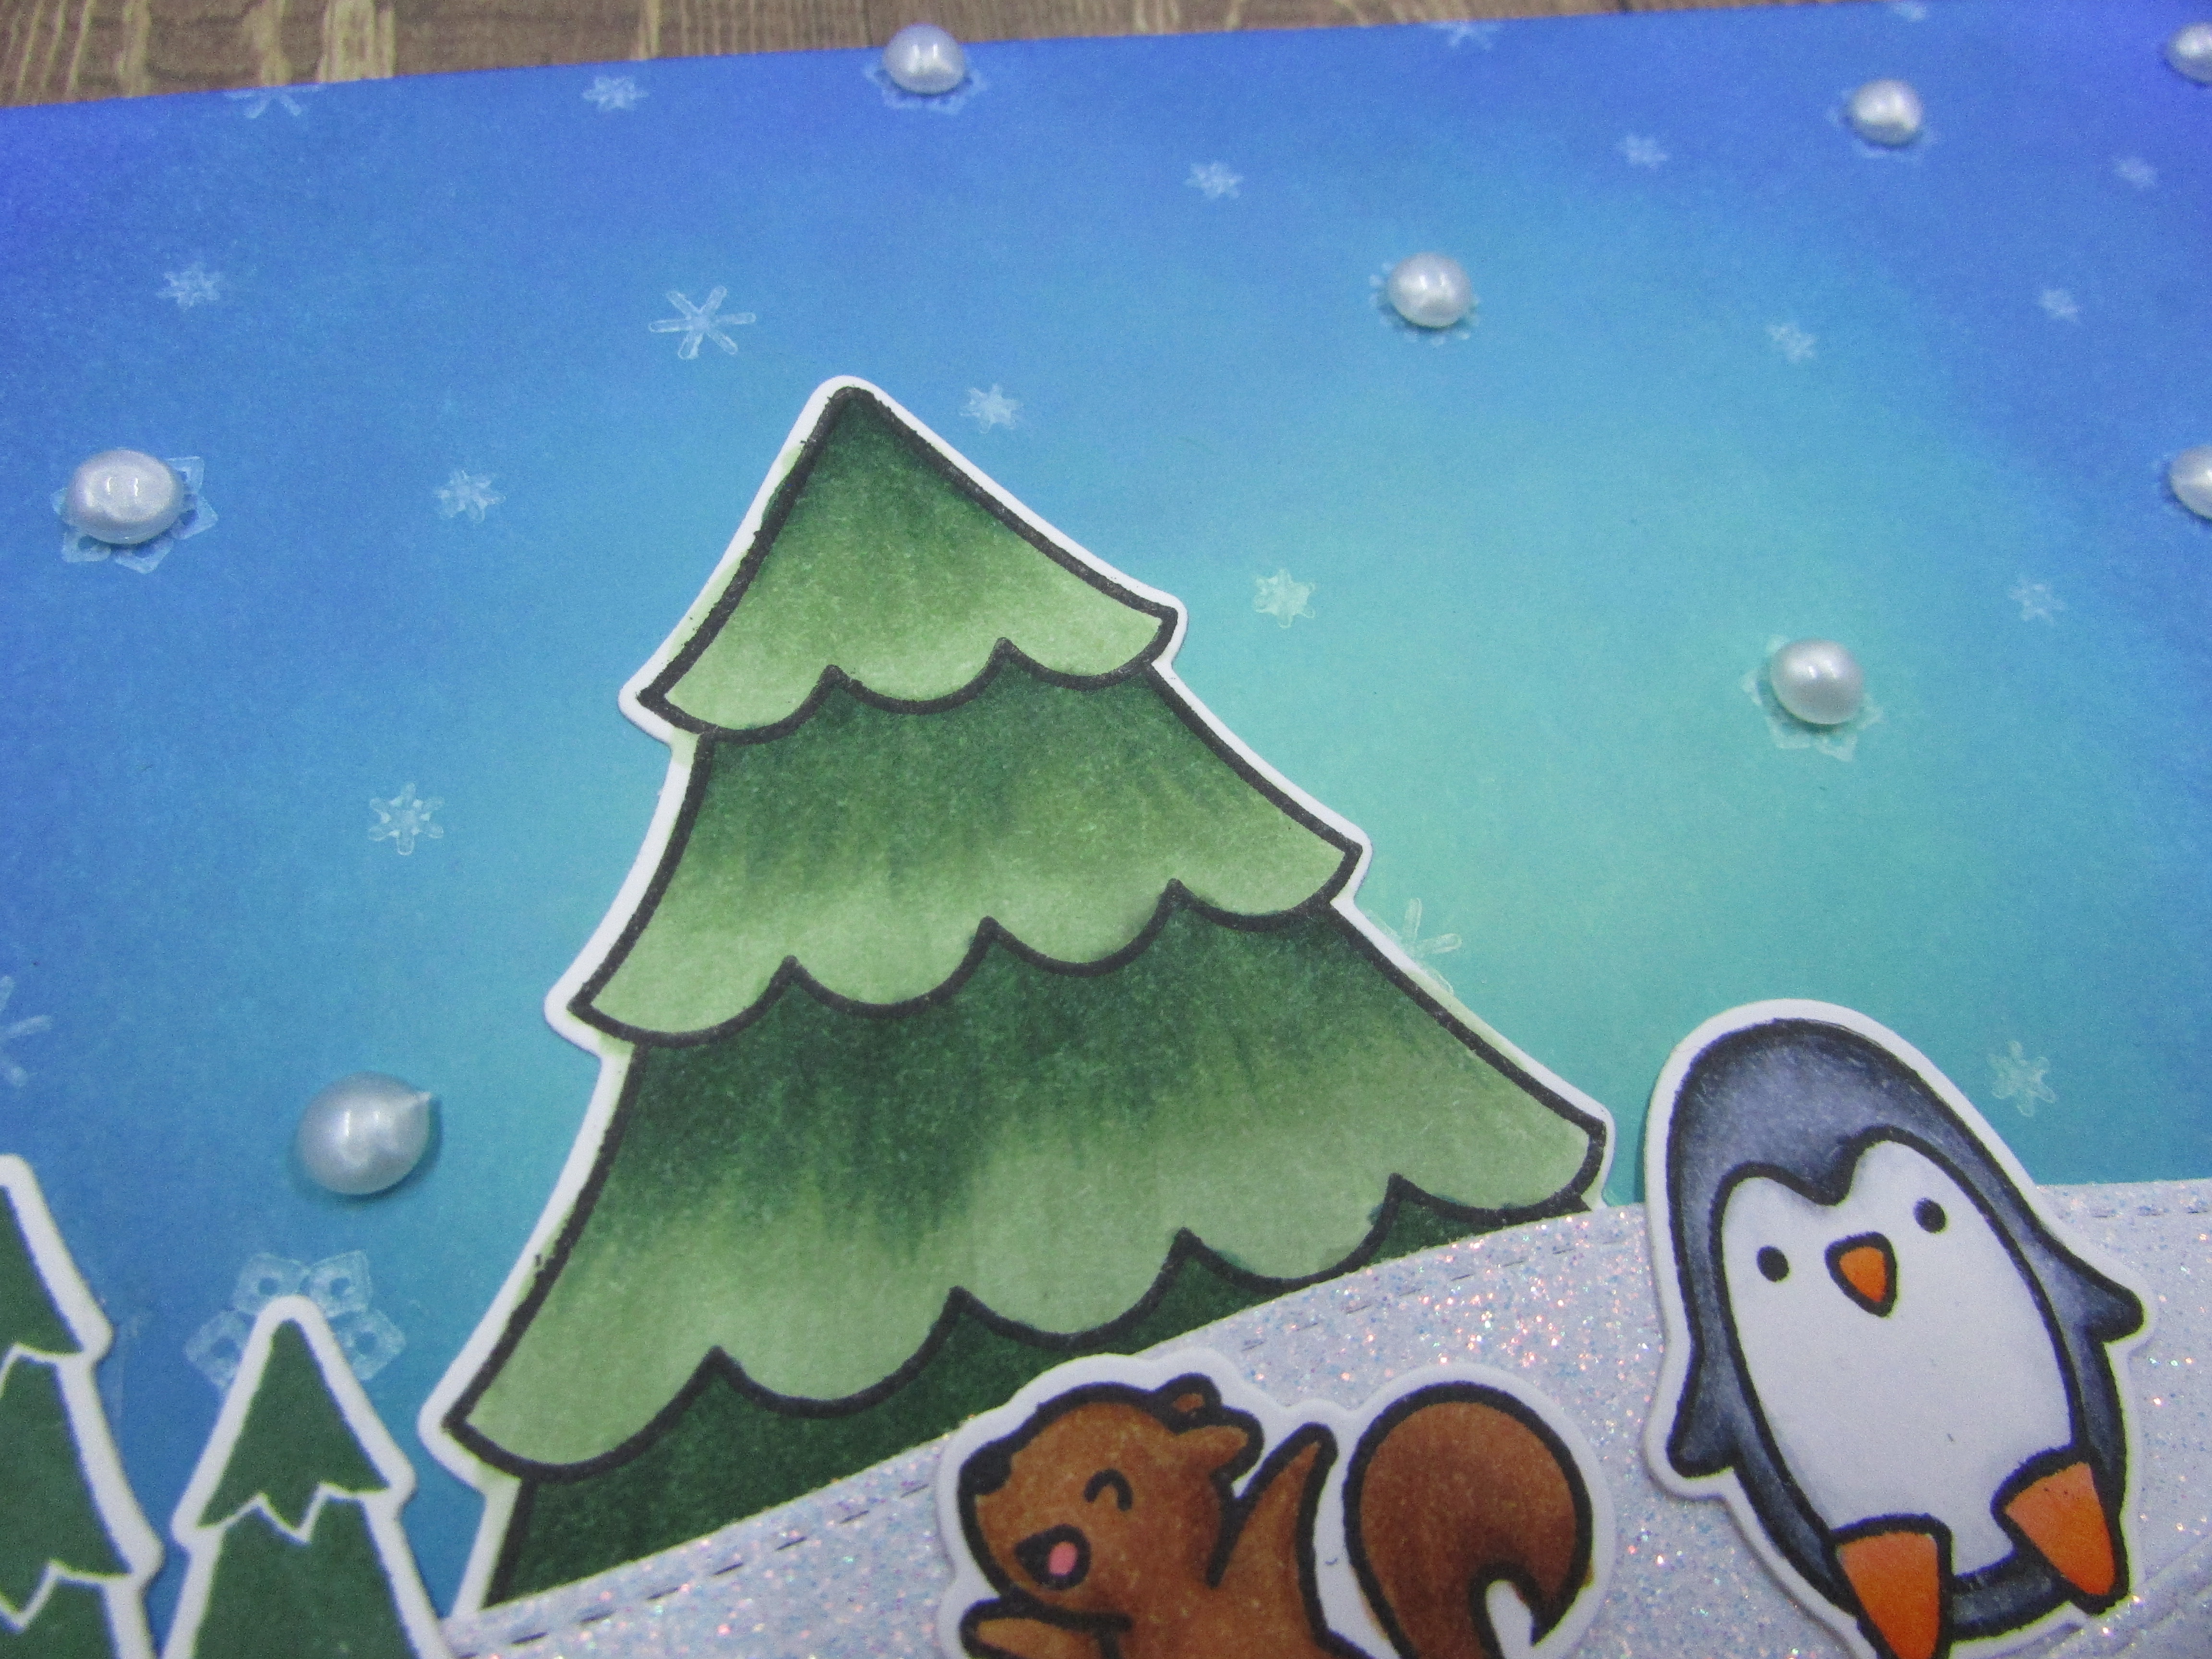
 Hi everyone! Diana here with a fun wintery scene that you can add to the front of a 5x7 card or place in a frame and use as winter decor. 


I had a lot of fun creating this winter scene. I've gotten into Lawn Fawn stamps lately and can't wait to get them out and start coloring them!

 I used cracked pistachio, peackcock feathers, and blueprint sketch distress oxide inks. Using the lightest to darkest I blended them together to get a beautiful night sky for my scene. I love how it created a glow around my tree. 


Once I had the background done I used a variety of small snowflake stamps with pigment white ink on the upper background area and let it dry. While this was drying I stamped and colored all of my images. I then cut some hills out of sparkle cardstock and started creating my scene. 

Once it was all put together I pulled out my black/white/silver dew drops and added some of the white ones to the snowflakes. 


Once it was all put together I pulled out my black/white/silver dew drops and added some of the white ones to the snowflakes. 

Supplies:

Robin's Nest: black/white/silver dew drops 

distress oxide inks, blender brushes, sparkle cardstock, lawn fawn stamps

Sunday, December 20, 2020

PEACE & JOY WITH RINEA FOIL

 Hi everyone! Welcome back to another design team project for


Today I created a soft and serene winter scene for you.


I started this card by blending two distress oxide blues on the background to give a pretty snowy look. 

Once I finished the blues I used the new distress oxide color rustic wilderness on the bottom half to blend in with my trees.


I, then, used Tim Holtz arctic cover plate to get the snowflakes from the Turquoise/Turquoise starstruck foiled paper


Next, I used Tim Holtz tree line die and cut it four times. Twice from white cardstock and once from two different green colored cardstock.


To create the white caps I cut the tip off of each white tree and adhered them onto the green tree lines.


I wanted to add a bit more foiled paper so I cut my sentiment from Silver/Silver starstruck foiled paper. I also cut it out three times from white cardstock and layered them on top of each other to give some dimension. 


Closer look at the process of layering. I love doing this as it gives more stability and I don't have to cut up any foam!

Once I have all of these pieces done I start putting my card together adding the two layers of trees with the lighter set in the background. 


To finish off the bottom I cut a strip of white cardstock to look like snow drifts in the forest and add a touch of tumbled glass distress oxide to it. I then add the snowflakes around the trees and off the edges. 


The final step is adding the sentiment. I didn't want to cover up the trees so I added it in the upper left hand corner. In this picture you can really see the dimension the layers add. 


 A closer look at the sky and snowflakes. 


Supplies:

Rinea: Silver/Silver Starstruck foiled paperTurquoise/Turquoise Starstruck foiled paper

Tim Holtz: tumbled glass, rustic wilderness, and broken china distress oxide ink, tree line & arctic thinlit dies, 

Catherine Pooler: peace & joy die

THANKS FOR STOPPING BY!!


THANKS ~ FRESHLY MADE SKETCHES #673

  Hi everyone! Today, I'm sharing a fun card I made using Freshly Made Sketches, sketch #673.  I have been working hard the last few mon...